Had to get some of the early seeds into the garden on Saturday. A lot of the seeds we have to save till May or June to plant, but carrots, onions, peas, broccoli, lettuce, spinach, parsnips, beets, cilantro, oregano, parsley and chives can all go in at this time of year where I live. I'll post a scan of my garden plan when I get a minute to give an idea of where everything is going to be placed in the beds.

The book "The Vegetable Gardener's Bible" gives a list of companion plants that supposedly "like" each other. Some plants attract the predator of the pest of their companion plant or they repel the pest of their companion plant due to their odor; or some plants supposedly increase the yield of their companion plant or improve the flavor of their companion plant. Anyway, there are literally books written on the subject of companion planting, but I haven't gotten deeply into it; I tried as best as I could, however, based on the list in the book, to plant seeds next to each other that would benefit each other.
Anyway, there isn't much to say about planting seeds except follow the instructions on the back of the package. Actually if planting in beds, you can plant seeds a bit closer than the packages say because the roots do a lot more growing down than out in beds. The Gardener's Bible discusses spaces for individual plants, as do the other books I mentioned in an earlier post. Most of the herbs that I put into the garden won't be put in beds. Some herbs (especially mint) are extremely prolific and can be a bit of a nuisance if not kept under control. So, I devoted a corner to herbs in the garden. I sunk a bunch of pots (below) into the soil and plan to just plant most of the herbs in those. The exception is cilantro, which we will probably need in larger quantities for salsa and cilantro pesto.

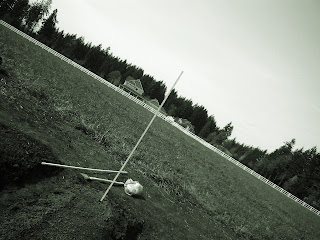
The only other thing worth posting about is my pea trellis, which I put up Saturday to plant the peas around. It was pretty simple to make; I got a 1"x2"x8' pine board (the real dimensions are .75"x1.75"x8') at Home Depot for 87 cents. (I love those things; I am making bean and cucumber trellises of a different style out of these things for really cheap... more on that in a future post.) First, I chopped a foot off of it because I didn't need all the length, then I sawed it in half lengthwise to get two poles .75"x.75"x7'.
I then marked it with a pencil two feet up from the bottom. This will be the depth to which I pound the stakes. After this mark, I make a mark every three inches on each stake until I reach the top. Using a manual miter saw, (the electric miter saw would give me a curved cut instead of a straight cut because of the radius of the blade) I cut along the pencil marks to a depth of about 1/8" or so. After I was done, I realized it might have been simpler to make these cuts before I sawed the board in half, but who cares.
After making the depth cuts, I pounded the stakes in the garden about 9 feet apart...
-
...and using the string left over from laying out the garden I tied sections of string up the posts at the three inch marks making sure each string was securely in the grooves on both stakes. When tying the strings on, the stakes like to flex near the top since they are relatively thin and you have to be careful not to pull the strings too tight as you work your way to the top or the bottom strings will go slack.
-
After the horizontal strings are all tied, then comes the vertical strings. I tied these every 6-8"; the tedious part is that you have to tie the vertical string to each of the horizontal strings to create the netting.
The trellis is very simple, but somewhat tedious to make. I had it made, though, in under an hour. After the trellis is up, you can plant the peas. I spaced the peas 1" apart staggering them on either side of the netting. I should have a thick wall of peas in a couple of months... good eating!!!
Here is my lovely assistant standing in front of the finished trellis...
... and my little girlfriend again with her bouquet of dandelions.


